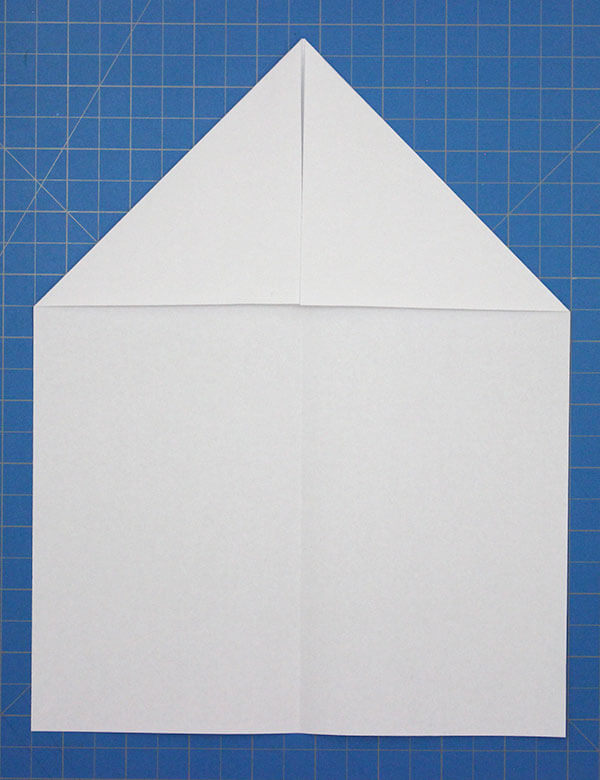
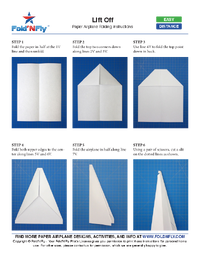
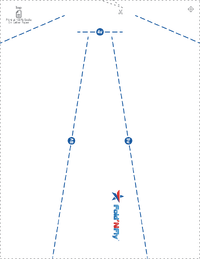
1. Fold the sheet in half and then fold both upper corner to the center.
Step 1
Fold the sheet in half and then fold both upper corner to the center.
2. Next, fold the top point back about 3cm.
Step 2
Next, fold the top point back about 3cm.
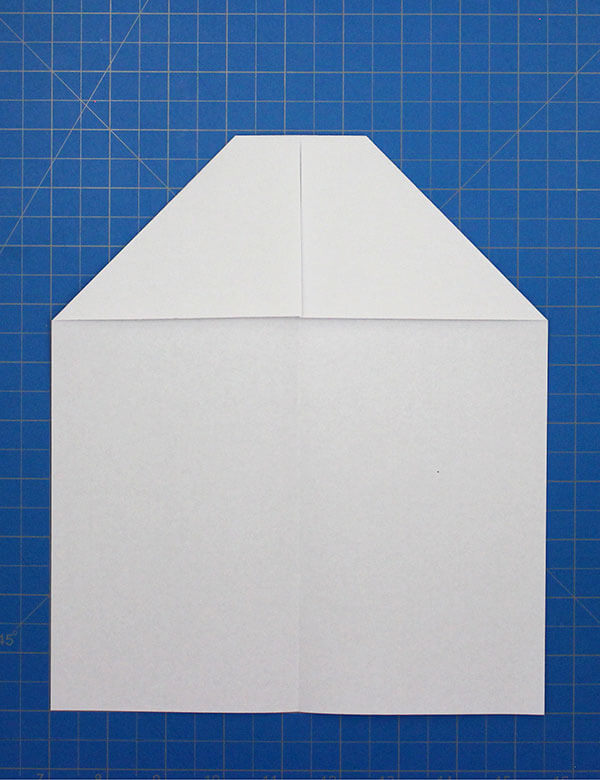
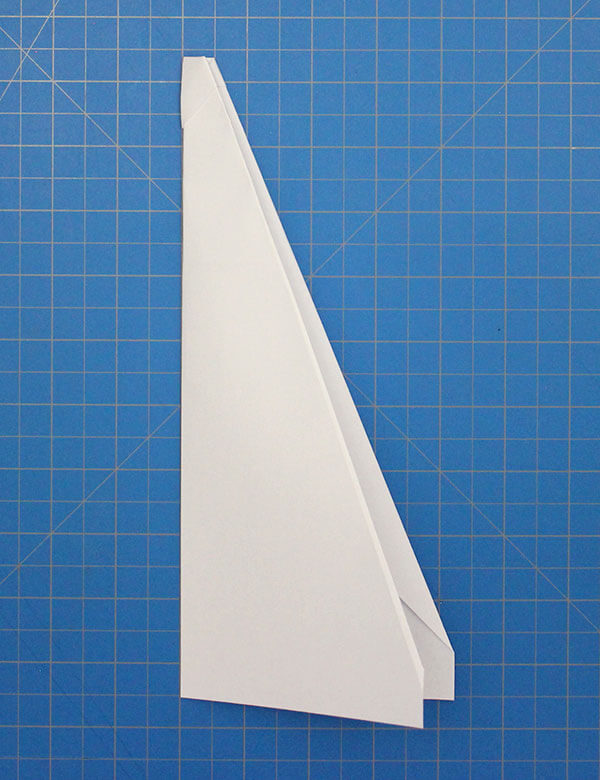
3. Fold both upper edges to the center line.
Step 3
Fold both upper edges to the center line.
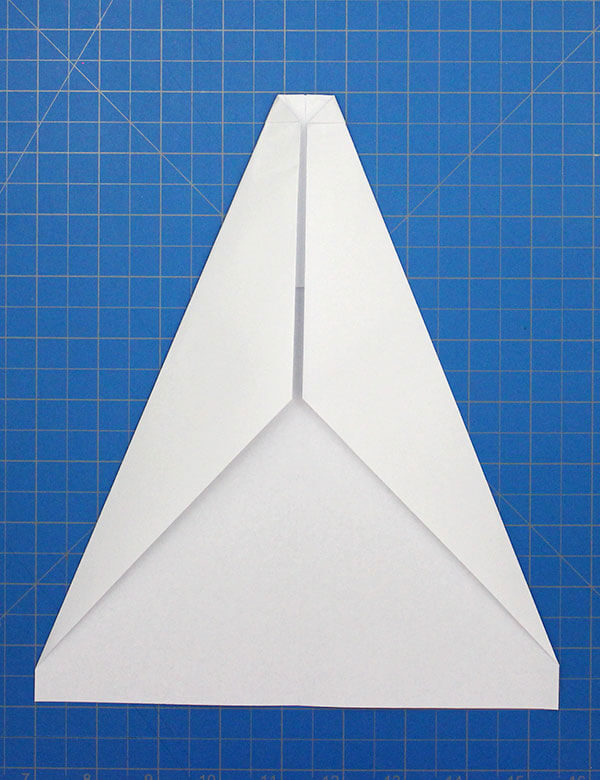
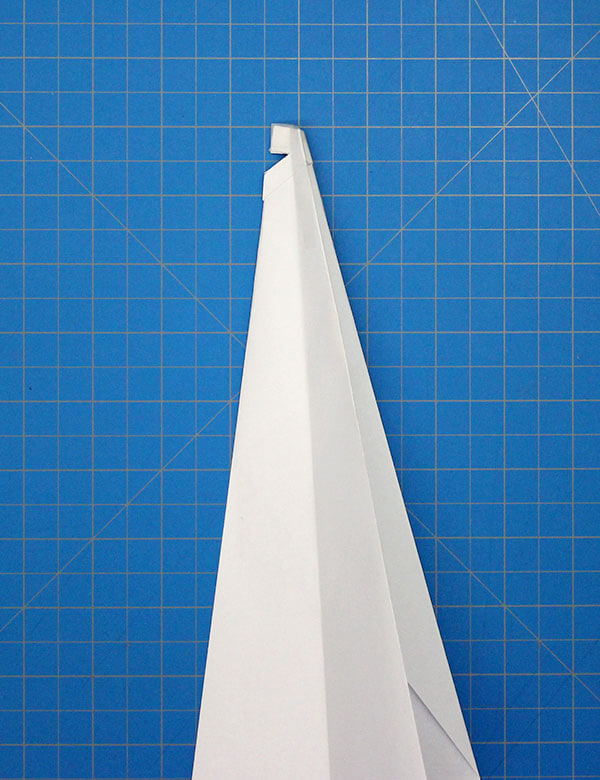
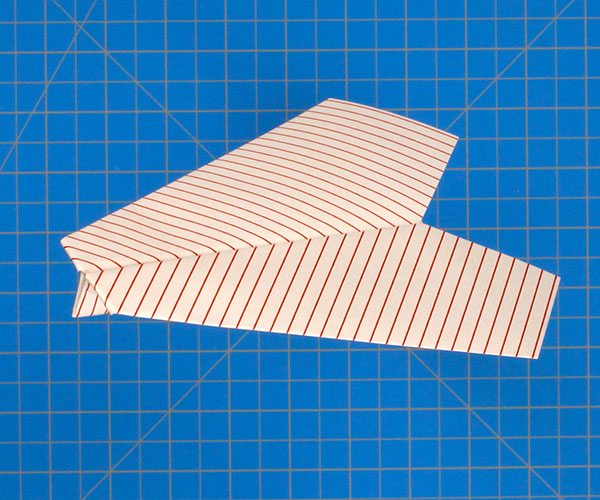
4. Fold the plane in half.
Step 4
Fold the plane in half.
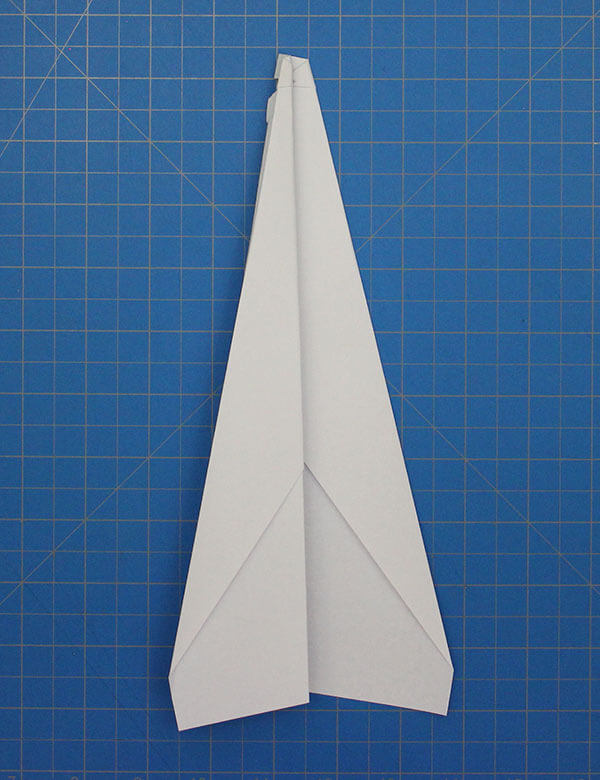
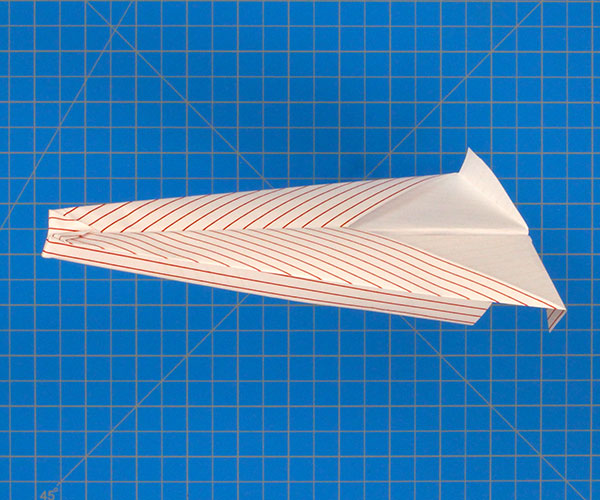
5. Grab a pair of scissors and cut out a slit like the one shown here.
Step 5
Grab a pair of scissors and cut out a slit like the one shown here.
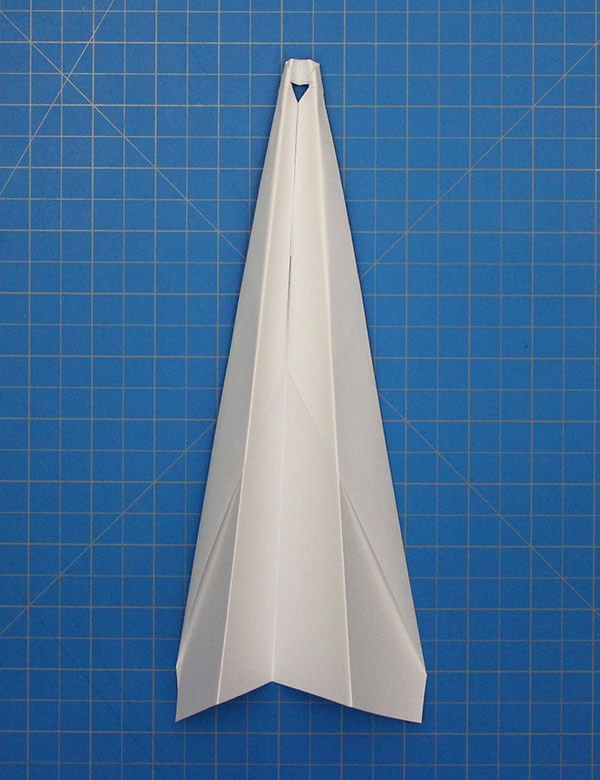
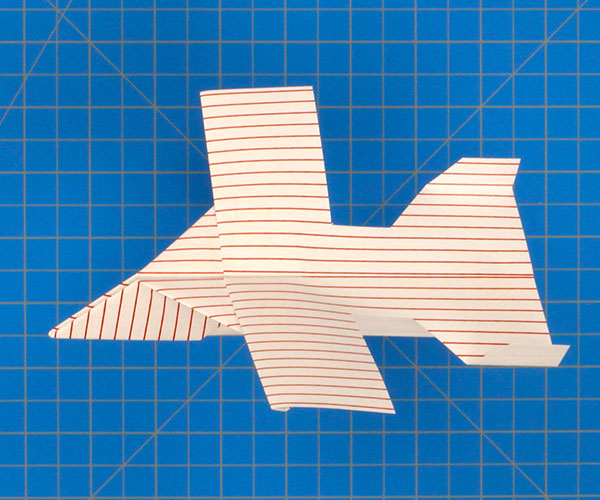
6. Now, fold out the first wing.
Step 6
Now, fold out the first wing.
7. Repeat with the other side.
Step 7
Repeat with the other side.
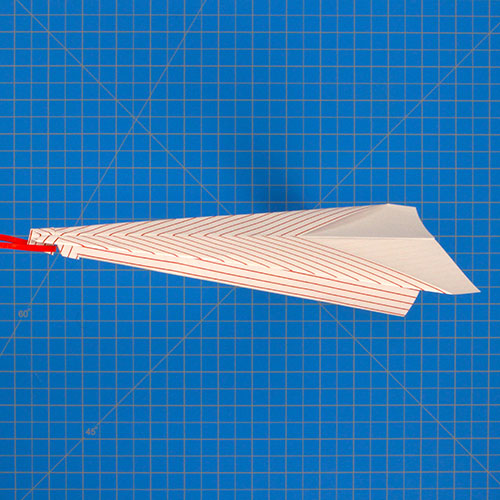
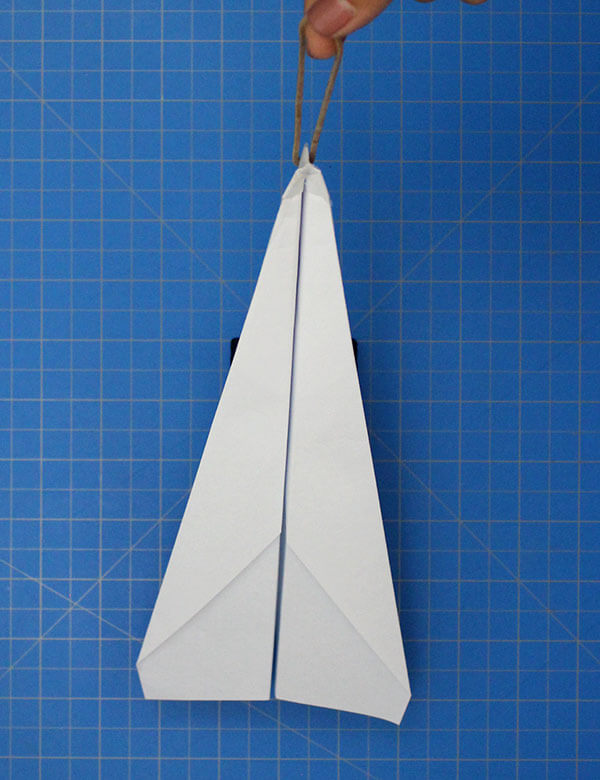
8. Finally, grab a rubber band and use it to fling the airplane across the room.
Step 8
Finally, grab a rubber band and use it to fling the airplane across the room.
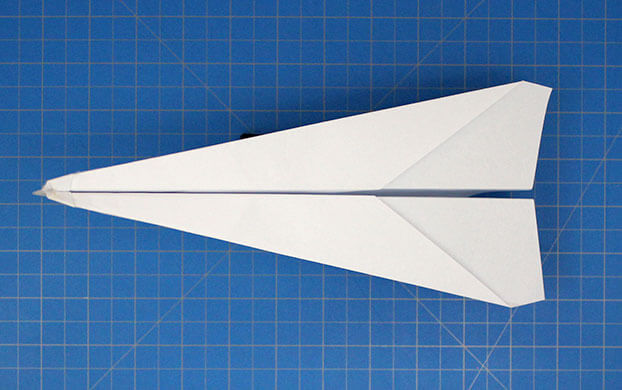
Final Paper Airplane Design
If needed, add a piece of tape to reinforce the notch on the nose. Tie the other end of the rubber band to a small stick so you have something easy to hold.
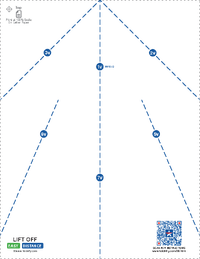
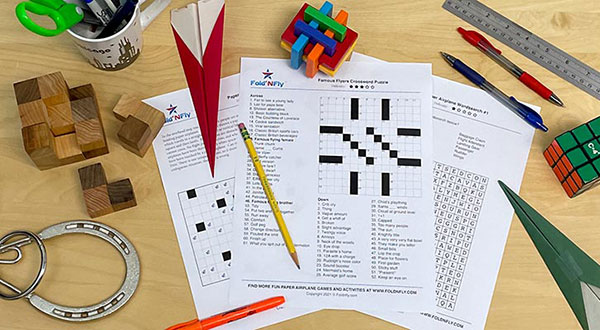
These beautiful, easy to follow, paper airplane folding instructions can be downloaded and printed as many times as you want. Simply follow the printed instructions and fold along the indicated lines to make a perfect paper airplane, every time.